Notes for Class XI Web Technology – I
HTML (HyperText Markup Language)
HTML is a
markup language, which is used to define the layout and attributes of a World
Wide Web (WWW) document as well as to create links between Web pages.
HTML is the
underlying foundation of Website design. It is a subset of SGML (Standard Generalized
Markup Language) and a high-level markup language.
HTML is a
short form of HyperText Markup Language, which means
(i) HyperText is
simply a piece of text that has some extra features like formatting, images,
multimedia and links to another document.
(ii) Markup
Language is a way of writing layout information within documents. HTML is a
page layout and hyperlink specification language. It allows images and other
objects to be embedded that can be used to create interactive forms. HTML
documents are described through HTML tags or elements.
HTML ELEMENTS or TAGS
HTML is
written in the form of tags. A tag refers to a string enclosed within angular
brackets (< and >). HTML elements represent semantics or meaning.
·
HTML tags are predefined and are not
case-sensitive.
·
All HTML tags are typed inside the angular
brackets (< and >) and the text between these brackets are called
elements.
·
The opening tags are written within the less
than (<) and greater than (>) signs, e.g. <HTML>
·
The closing tags are written within the < and
> signs with a forward slash (/) appended before the name of the tag. e.g.
</HTML>
·
The attributes are always specified in the
opening tags, which provides additional information about that tag. It comes in
name/value pairs like name = “value”, e.g. <FONT size =“5”>
There are
two kinds of elements, i.e. Container elements and Empty elements.
Container Elements
These types
of HTML elements always wrap around the text or graphics which come in a set
with an opening as well as a closing tag. In other words, HTML tags that
include both On and Off tags are known as container tags.
e.g. <HTML>……..</HTML>
Empty Elements
On the other
hand, the empty elements are standalone tags, i.e. empty tags do not have to be
wrapped around text or graphics and do not require a closing tag.
In other
words, HTML tags that include only On tag and there is no Off tag then, these
tags are known as empty tags.
e.g.
<HR> inserts a horizontal line
<BR> adds a line break
HTML STRUCTURE
HTML
document is a combination of various tags, which define the structure and
appearance of the Web page.
Following
four basic structure elements are always present in every HTML document:
(i) The
<HTML> tag tells the browser that this is an HTML document. You must
begin your html files with this tag and must end your html file with matching
closing tag.
(ii) The
<HEAD> tag is used for text and tags that do not appear directly on the
page. It acts as a header of file and contains some information like setting
the title of the Web page.
(iii) The
<TITLE> tag contains the document title. This tag lies between
<HEAD> and </HEAD> tags. The title specified inside this tag
appears on the browser’s title bar.
(iv) The
<BODY> tag is used for text and tags that appears directly on the Web
page. It helps us to create a look and feel of the Web page. It holds all your
content words, pictures and other stuff. The most basic structure needed for
creation of any Web page are as follows: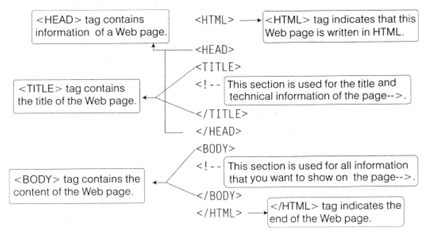
CREATING and SAVING a HTML DOCUMENT
Since, HTML
documents are just text files, they can be written in any simple text editor
like Notepad, FrontPage, Dreamweaver, WordPad etc.
If you are
using a Notepad to create a HTML document, the steps are as follows:
Step 1: Open
Notepad by clicking at
Start —>
All Programs —> Accessories —> Notepad.
Step 2: Type
the HTML document in Notepad as shown in the following figure: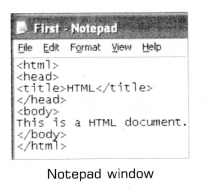
Step 3: To
save the document, click at File menu —> Save As command.
Step 4: The
Save As dialog box will appear as shown in the following figure: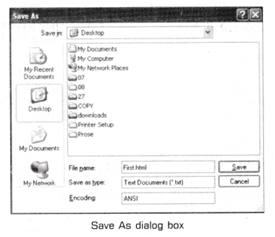
Step 5: In Save
As dialog box, after selecting the desired folder, give the desired file name
along with the extension .htm or .html in the File name: box and then, click
Save button. In the above figure, we have saved out HTML document under name
First.html.
VIEWING HTML DOCUMENT in a BROWSER
You can view
HTML document in any Web browser such as Internet Explorer, Mozilla Firefox,
Opera, Apple Safari, Netscape Navigator, Google Chrome etc.
BASIC HTML TAGS
HTML provides
some basic tags which are required for HTML code.
<HTML>Tag
It
represents the root of an HTML document, so it acts as a container for all
other HTML elements. It informs the browser that it is dealing with an HTML
document. It is very important to place both of these tags (open and close HTML
tags) in your documents as they tell the browser, where your page begins and
ends,
e.g.
<HTML>
</HTML>
<HEAD> Tag
This element
is a container for all the header elements. The <HEAD> tag must include a
title for the document that can include scripts, styles, meta information and
many more. The second line of your HTML document should be <HEAD>.
The content
contained in the head section of your document provides information to the
browsers and search engines but, it is not displayed directly on the Web page.
The end of the head tag is indicated by </HEAD>.
e-g.
<HTML>
<HEAD>
Header information comes here
</HEAD>
</HTML>
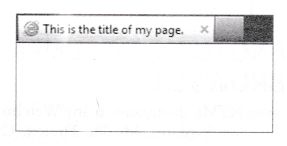
<TITLE> Tag
This tag
defines the title of the document. Title must be a simple text and should not
be same as the file name. It is placed between <HEAD> and </HEAD>
tags.
eg-
<HTML>
<HEAD>
<TITLE>
This is the title of my page.
</TITLE>
</HEAD>
</HTML>
Output
<BODY> Tag
This tag
defines the document’s body. It is used to set the basic page characteristics.
It contains all the necessary contents of a HTML document, such as text,
hyperlinks, images, tables, lists etc. The content of your Web page is placed
in between the opening <BODY> and closing </BODY> tags.
The
<BODY> tag is opened just after the head section is closed. It is closed
just before closing the <HTML> tag.
e.g.
<HTML>
<HEAD>
<TITLE>
My First Web Page
</TITLE> .
</HEAD>
<B0DY>
Hello world. This is my first web page.
</B0DY>
</HTML>
Output
Attributes
of <BODY> Tag
This tag
provides various attributes, which are as follows:
background
This
attribute specifies a background image for a document. HTML supports various
graphics format such as .gif, .jpg etc.
Syntax
<B0DY background=“URL”>
Where, URL may be an image name or a path of
an image.
e-g-
<HTML>
<HEAD><TITLE>
Background Image </TITLE></HEAD>
<B0DY background ="image.jpg”>
</B0DY>
</HTML>
Output

text
This
attribute specifies the color of the text in a document.
Syntax
<B0DY text=“color_name|hex_number|rgb_number”>
Attribute
Values
Value Description
color_name Specifies the text-color with a color
name (like “red”).
hex_number Specifies the text-color with a hexadecimal
code (like “#FF0000”) where, # stands for the color number.
rgb_number Specifies the text-coior with a rgb(red,
green, blue) code (like “rgb(255,0,0)”).
e.g. <HTML>
<B0DY
text=“red”>
Arihant
Publication </B0DY>
</HTML>
bgcolor
This
attribute specifies the background color of a document.
Syntax
<B0DY
bgcol or=“color_name|hex_number|rgb_number”>
e.g.
<HTML>
<B0DY
bgcolor="red”>
</B0DY>
</HTML>
link
This
attribute specifies the color of an unvisited link in a document. The default
color of link attribute is blue (#0000FF).
Syntax
<B0DY
1ink=“color_name | hex_number | rgb_number”>
e.g.
<HTML>
<B0DY Link=“red”>
</B0DY>
</HTML>
alink
This
attribute specifies the color of an active link in a document (a link get
activated when it is clicked). The default color of an alink attribute is red
(#FF0000).
Syntax
<B0DY
alink=“color_name | hex_number | rgb_number”>
e.g.
<HTHL>
<B0DY
alink=“blue”>
</B0DY>
</HTML>
vlink
This
attribute specifies the color of a visited link in a document. The default
color of vlink attribute is purple (#800080).
Syntax
<B0DY vlink=
“color_name | hex_number | rgb_number”>
Eg:
<HTML>
<B0DY
vlink = "blue”>
</B00Y>
</HTHL>
topmargin
Sets a
topmargin (distance between the top of the document and the top of the browser
window) of your body element.
Syntax
<BODY topmargin=“value”>
e.g.
<HTML>
<HEAD>
<TITLE> Topmargin </TITLE>
</HEAD>
<BODY topmargin=“65”>
Arihant Publications is one such reputed name
in the field of books
which has
the best available books in the market. </BODY>
</HTML>
Output
leftmargin
Sets a left
hand margin (distance between the left side of the document and the left edge
of the browser window) of your body element.
Syntax
<BODY Leftmargin=“value”>
e.g.
<HTML>
<HEAD>
<TITLE> Leftmargin </TITLE>
</HEAD>
<BODY Leftmargin=“65”>
Arihant Publications is one such reputed name
in the field of books
which has
the best available books in the market. </BODY>
</HTML>
Output

<FONT> Tag
This tag
specifies the font face, font size and font color of the text. The <FONT>
tag provides no real functionality by itself but with the help of a few
attributes, this tag is used to change style, size and color of HTML text
elements. This tag is generally used for changing the appearance of a short
segment of text. It can be set for a character, sentence or entire document.
Attributes
of <FONT> Tag
Following
are the attributes of <FONT> tag:
size
This
attribute specifies the size of the text inside a <FONT> tag. The range
of accepted values goes from 1 (the smallest) to 7 (the largest). We can also
set the relative size to the current size using (+) ve or (-) ve sign,
e.g. size =
+2
Syntax
<F0NT size=“number”>
Attribute
Value
Value Description
number A number from 1 to 7, that
defines the size of the text. Default number of value is 3.
e.g.
<HTML>
<HEAD>
<TITLE>
Font Size </TITLE>
</HEAD>
<B0DY>
<FONT size=“4”>
This is the default size. </FONT>
</B0DY>
</HTML>
Output
face
This
attribute specifies the font name or type face of the text inside a
<FONT> tag.
Syntax
<F0NT face=‘‘font_family”>
Attribute
Value
Value Description
font_family The font name of the
text specifies a prioritized list of several fonts, separate the names with a
comma (like <FONT face=“verdana,arial,sans-serif ”>.
e.g.
<HTML>
<HEAD>
<TITLE> Font Face </TITLE>
</HEAD>
<BODY>
<FONT face=“verdana”> This is some text!
</FONT>
</BODY>
</HTML>
Output
color
This
attribute specifies the color of the text inside a <FONT> tag.
Syntax
<FONT
color=“color_name|hex_number|rgb_number”>
e.g.
<HTML>
<BODY>
<FONT color=“red”>
This is some text!
</FONT>
</BODY>
</HTML>
Some
examples of using <FONT> tag are as follows:
<FONT
size="3” color=“orange”>
This is an
example!</FONT>
<FONT
face=‘‘arial ” color=‘‘green”>
This is a
table!</FONT>
<FONT
size =+2> ABC </FONT>
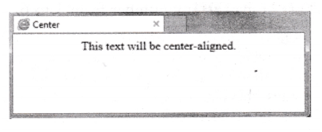
<CENTER> Tag
This tag is
used to centralize a segment of text to be displayed on browser’s window. With
the <CENTER> tag, closing tag </CENTER> is always used. Anything
between these two tags will be centered including text, images or tables.
Syntax
<CENTER> ... </CENTER>
eg-
<HTML>
<HEAD>
<TITLE> Center </TITLE> .
</HEAD>
<BODY>
<CENTER> This text will be center-aligned.
</CENTER>
</BODY>
</HTML>
Output
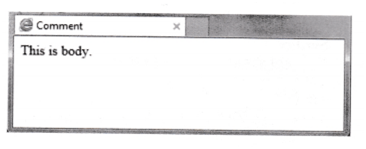
Comment <!-…- -> Tag
This tag is
used to insert comments in the source code of the Web page. Comments are not
displayed in the browser’s window.
All the text
inserted inside this tag (<! — … — >) will be ignored by the browser that
made invisible for the user. You can use comment to explain your code, it can
help you, when you edit the source code later. This is especially useful, when
you have a lot of codes.
Syntax
<! - -.... - ->
<HTML>
<HEAD>
<TITLE> Comment </TITLE>
</HEAD>
<BODY>
<!- - This is a comment. - - > This is
body.
</BODY>
</HTML>
Output
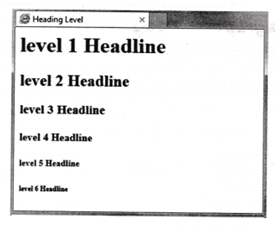
Heading Tags
In HTML,
heading tags are used to display the text as a heading. It can also be used to
give section headings. There are six levels of headings, ranging from
<H1>…</H1> to <H6>…</H6>. <H1> defines the most
important largest heading level. <H6> defines the smallest heading level.
Syntax
<Hn>...........</Hn>
Where, n may be any number from 1 to 6.
eg-
<HTML>
<HEAD>
<TITLE> Heading Level </TITLE>
</HEAD>
<B0DY>
<H1> level 1 Headline </H1>
<H2> level 2 Headline </H2>
<H3> level 3 Headline </H3>
<H4> level 4 Headline </H4>
<H5> level 5 Headline </H5>
<H6> level 6 Headline </H6>
</BODY></HTML>
Output
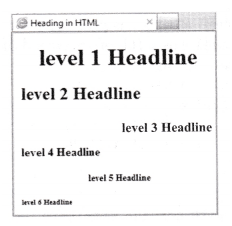
Attribute of
<HEADING> Tag
Following is
the attribute of <HEADING> tag:
align
This
attribute specifies the alignment of the text as heading. By default, alignment
is left.
Syntax
<Hn align=“center | left | right | justify”>
</Hn>
Where, n=l to 6
eg-
<HTML>
<HEAD>
<TITLE> Heading in HTML </TITLE>
</HEAD>
<BODY>
<H1 align = “center”>level 1
Headline</H1>
<H2>
level 2 Headline </H2>
<H3 align = “right”> level 3 Headline
</H3>
<H4> level 4 Headline </H4>
<H5 align = "center”> level 5
Headline </H5>
<H6>
level 6 Headline </H6>
</BODY>
</HTML>
Output
Paragraph <P> Tag
This tag is
used to mark a block of text as a paragraph. It is used to insert a line break
with extra space in the beginning. This is a container tag.
Syntax
<P>.........</P>
e.g.
<HTML>,
<HEAD>
<TITLE> Paragraph </TITLE>
</HEAD>
<BODY>
<P>This is some text in a
paragraph.</P>
</BODY>
</HTML>
Output
Attribute of
<P> Tag
Following is
the attribute of <P> tag:
align
This
attribute specifies the alignment of the text within a paragraph. By default,
alignment is left.
Syntax
<P align="left|right|center|justify”>
e.g.
<HTML>
<HEAD>
<TITLE> P tag with align attribute </TITLE>
</HEAD>
<BODY>
<P align="right”> This is some text in a paragraph. </P>
</BODY>
</HTML>
Output
Line Break <BR> Tag
This tag is
used to insert a line break which means the text/image following the tag will
be moved to the next line when displayed in the browser. To add a single line
of space, you can use a break tag <BR>.
This is an
empty tag, i.e. no need of closing tag. You can also use the <BR> tag to
insert one or more blank lines.
eg.
<HTML>
<HEAD>
<TITLE> Line Break </TITLE>
</HEAD>
<BODY>
This text contains <BR> a line break.
</BODY>
</HTML>
Output
Horizontal Rule <HR> Tag
To create a
horizontal line on your page, you have to use the empty tag <HR>. This
horizontal line can be used to divide information into sections.
Attributes
of <HR> Tag
Following
are the attributes of <HR> tag:
align
This
attribute specifies the alignment of a horizontal line.
Syntax
<HR align=“left|center|right”>
e.g.
<HTML>
<HEAD>
<TITLE> HR tag with align attribute </TITLE>
</HEAD>
<BODY>
<HR align=“right”>
This is a line.
</BODY>
</HTML>
Output
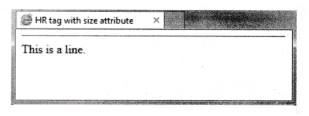
size
This
attribute specifies the height of the rule in pixels. A pixel is a tiny dot
that makes up the display of your computer. Its default value depends directly
on the browser. The default size of a rule is 3 pixels.
Syntax
<HR size="pixels”>
Attribute
Value
Value Description
pixels The height of the <HR> tag in pixels.
e.g.
<HTML>
<HEAD>
<TITLE> HR tag with size attribute </TITLE>
</HEAD>
<BODY>
<HR size=“3”>
This is a line.
</BODY>
</HTML>
Output
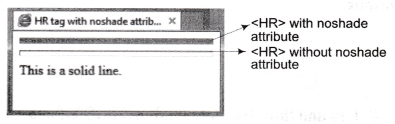
noshade
When this
boolean attribute is present, the rule is drawn with a solid black line as a 2D
effect instead of the default 3D effect, i.e. without shading.
Syntax
<HR noshade>
<HTML>
<HEAD>
<TITLE>
HR tag with noshade attribute </TITLE>
</HEAD>
<B0DY>
<HR size = "5” noshade>
<HR size= “5”>
This is a sol id line.
</B0DY>
</HTML>
Output
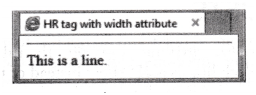
width
This
attribute specifies the width of a horizontal line in pixels or percent. Its
default value is 100%.
Syntax
<HR width=“pixels or %”>
Attribute
Value
Value Description
pixels The width in pixels (like ‘100 px’ or just
‘100’).
% The width in percent of the
available space (like ‘50%’).
e.g.
<HTML>
<HEAD>
<TITLE> HR tag with width attribute </TITLE>
</HEAD>
<BODY>
<HR width=“50%”>
This is a line.
</BODY>
</HTML>
Output
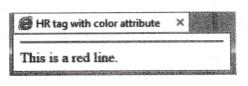
color
This
attribute specifies the color of the horizontal line.
Syntax
<HR
color="color_name|hex_number|rgb_number”>
e.g.
<HTML>
<HEAD>
<TITLE> HR tag with color attribute </TITLE>
</HEAD>
<BODY>
<HR color=“red”>
This is a red line.
</BODY>
</HTML>
Output
Colors and
their Hexadecimal and RGB Values
Color Name Hexadecimal Value RGB Value
Aqua #00FFFF gb(0,255,255)
Black #000000 rgb(0,0,0)
Blue #0000FF rgb(0,0,255)
Fuchsia #FF00FF rgb(255,0,255)
Gold #FFD700 rgb(255,215,0)
Gray #808080 rgb(128,128,128)
Green #008000 rgb
(0,128,0)
Khaki #F0E68C rgb(240,230,140)
Lime #00FF00 rgb(0,255,0)
Maroon #800000 rgb(128,0,0)
Navy #000080 rgb
(0,0,128)
Olive #808000 rgb(128,128,0)
Orange #FFA500 rgb(255,165,0)
Pink #FFC0CB rgb(255,192,203)
Purple #800080 rgb(128,0,128)
Red #FF0000 rgb(255,0,0)
Silver #C0C0C0 rgb(192,192,192)
Style Tags
HTML
provides various style tags, which are as follows:
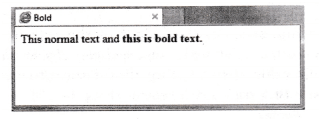
Bold <B> Tag
This tag
specifies the text into bold text. It is a container element.
Syntax
<B>............</B>
e.g.
<HTML>
<HEAD>
<TITLE> Bold </TITLE>
</HEAD>
<BODY>
<P> This normal text and <B> this is bold
text. </B> </P>
</BODY>
</HTML>
Output
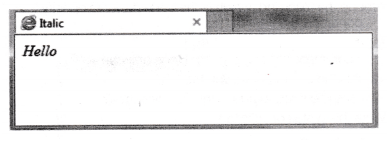
Italic <I> Tag
This tag is
used to make the text in italic form. It is also a container element.
Syntax
<I>........</I>
e.g.
<HTML>
<HEAD>
<TITLE> Italic </TITLE>
</HEAD>
<BODY>
<I> Hello </I>
</BODY>
</HTML>
Output
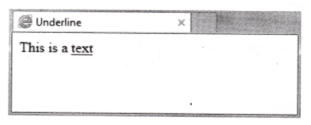
Underline <U> Tag
This tag is used to underline the text. It is
also a container element.
Syntax
<U>...........</U>
e.g. <HTML>
<HEAD>
<TITLE> Underline </TITLE>
</HEAD>
<BODY>
<P> This is a <U> text </U>
</P>
</B0DY>
</HTML>
Output
HTML LISTS
Types of
Lists
Unordered List <UL>
This list
(also known as unnumbered list) is an indented list with a bullet symbol in
front of each list item.
An unordered
list starts with the <UL> tag. Each list item starts with the <LI>
tag. The list items are marked with bullets (typically small black circles).
The
unordered list tag is a container tag. The default bullet type for most Web
browsers is a full disc (black circle), but this can be adjusted using an HTML
attribute called type.
Syntax
<UL>............</UL>
eg-
<HTML>
<HEAD>
<TITLE> Unordered List </TITLE>
</HEAD>
<BODY>
<UL>
<LI>My first item on the
list.</LI>
<LI>My second item on the
list.</LI>
<LI>My third item on the
list.</LI>
<LI>My fourth item on the i
ist.</LI>
</UL>
</BODY>
</HTML>
Output

Attribute of
Unordered List Tag
Following is
the attribute of <UL> tag:
type
This
attribute is used to change the bulleted symbol in a list. The attribute may
have a value of circle, disc or square.
Syntax
<UL type="value”>
HTML
Unordered List Types Value
Value Description
Square Use black square bullet (■)
Disc Use solid circle bullet (•)
Circle Use a hollow bullet (°)
Here, we are
using <UL> HTML code in the below example and we get various output as
follows:
<UL
type=“square”>
<UL type=“disc”>
<UL type=“circle”>
HTML
Unordered List Types Output
Square Disc Circle
■ Rose •
Rose o
Rose
■ Lotus •
Lotus °
Lotus
■ Lily •
Lily o
Lily
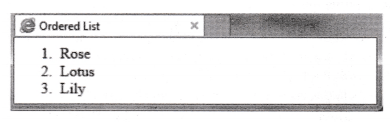
Ordered List <OL>
This list
starts with the <OL> tag. Each list item starts with the <LI> tag.
The list items are marked with numbers. The ordered list tag is a container tag
which is used for numbered lists. By default, the numbering will be 1, 2, 3 … .
You can also adjust the numbering using type attribute.
Syntax
<OL>.....</OL>
e.g.
<HTML>
<HEAD>
<TITLE> Ordered List </TITLE>
</HEAD>
<BODY>
<OL>
<LI> Rose </LI>
<LI> Lotus </LI>
<LI> Lily </LI>
</OL>
</BODY>
</HTML>
Output
Attributes
of Ordered List Tag
Following
are the attributes of Ordered list:
type
The
numbering of an HTML list can be changed to letters or roman numerals by the
type attribute.
Syntax
<OL
type=“value”>
HTML Ordered
List Types Value
Value Description
1 The default, uses arabic numerals
I Uses uppercase roman numerals
i Uses lowercase roman numerals
A Uses uppercase letters
a Uses lowercase letters
Here, we are
using <OL> HTML code in the below example and we get various output as
follows:
<OL type=“a”>
<OL type=“A”>
<OL type=“i”>
<OL type=“I”>
HTML Ordered
List Types Output
Lowercase roman numerals Uppercase roman numerals
i. Rose I.
Rose
ii. Lotus II.
Lotus
iii. Lily III.
Lily
Lowercase letters Uppercase
letters
a.Rose A. Rose
b.Lotus B.Lotus
c.Lily C. Lily
start
This
attribute is used to change the beginning value of an ordered list. Normally,
the ordered list begins with 1. It lets you further customize an HTML ordered
list by setting a new starting digit for the ordered list element.
Syntax
<OL start=“value” type = “value”>
e.g.
<HTML>
<HEAD>
<TITLE> Ordered List with type attribute </TITLE>
</HEAD>
<BODY>
<OL start=‘1" type=“1” >
<LI> Rose </LI>
<LI> Lotus </LI>
<LI> Lily </LI>
</OL>
</BODY>
</HTML>
Output
Definition List
This is a
list of items, with a description of each item. HTML definition lists
(<DL>) are indented list without any bullet symbol or any number in front
of each item. This list elements have a unique array of tags and elements; the
resulting lists are similar to those you would see in a dictionary.
Tags used in
definition lists are as follows:
<DL>
Opening tag that defines the start of the list.
<DT>
List item that defines the definition term.
<DD>
Definition of the list item.
</DL>
Closing tag that defines the end of the list.
The terms
DL, DT and DD stand for definition list, definition term and definition
description.
e.g.
<HTML>
<HEAD>
<TITLE> Definition List </TITLE>
</HEAD>
<BODY>
<DL>
<DT><B> Fromage </B>
<DD> French word for cheese
<DT><B> Voiture </B>
<DD> French word for car
</DL>
</BODY>
</HTML>
Output
Nested List
List can be
nested that means one list can be placed inside another. In the nested list,
one or more items can contain sub-items.
eg-
<HTML>
<HEAD>
<TITLE> Nested List </TITLE>
</HEAD>
<BODY>
<UL>
<LI> Fruits </LI>
<OL type=“1”>
<LI> Mango </LI>
<LI> Apple </LI>
</OL>
<LI> Vegetables </LI>
<OL type=“1”>
<LI> Onion </LI>
<LI> Tomato </LI>
</OL>
</UL>
</BODY>
</HTML>
Output
***


